If you don’t read though this information, you may destroy your email system.
This post is for those who installed the modified version of EHCP force from this site and said no to the Dovecot question at install time, the procedure documented in this post will only work on the above version using Ubuntu server 26.04.
If you changed your mind about using Dovecot, then well done, using just Dovecot and Postfix for your email on EHCP force will provide you with a safer more robust email system, also you will be able to follow the procedure in THIS POST to set up a user interface for Spamassassin.
The great thing is, even though you initially said no, there is a script ready to go already on your server’s hard drive which was prepared at install time with all of the essential settings and user credentials that it requires (without these it will not work). This script makes the conversion process simple.
There is a problem though, if you already have email accounts (mailboxes) set up that contain important emails that you wish to keep, we need to import the mailboxes into your new Dovecot setup. The standard EHCP force Courier mailboxes are not compatible with dovecot ones, however there is a free conversion tool on git hub, that will do some (but not all) off the work. Let me be absolutely clear though, it is better to start your new Dovecot setup with empty clean mailboxes, you WILL NOT have to delete and re-create any email account as Dovecot will recognise them, and build new mailboxes automatically. So, this is the options, allow Dovecot to build nice new clean but empty mailboxes, or convert your existing ones, simply to preserve important emails contained within them.
It would be much less pain to simply forward your important emails to another email account not hosted on your server, thus removing the need for a backup and restore procedure.
Please be aware that we will have to force Roundcube to set your new Dovecot mailboxes back to default settings for this to work, in other words specific setting like your name and reply email address will have to be set up again, regardless as to whether you want to keep any existing emails. The Roundcube defaults you set when you ran the script from THIS POST will be preserved.
The backup procedure for your existing mailboxes is quite simple, however the restore procedure after the Dovecot conversion is complicated, and in my opinion NOT WORTH ALL THE WORK.
Just to add to the problems of the backup and restore procedure, the backup, conversion and finally the restore procedure, must be done (in the correct order), all in one go, for it to have the best chance of success. The longer you wait between performing each of the procedure, lowers the chances of success.
Finally, the backup and restore procedure MAY FAIL, and result in the loss of your important emails anyway.
I recommend that you start with clean empty new mailboxes but as always, it’s your call.
How to back up your existing courier mailboxes.
ONLY DO THIS IS YOU NEED TO KEEP STORED EMAILS.
If you don’t need to keep any emails SKIP THIS STEP, and start on the Perform your Dovecot Conversion section instead.
Ok. We can perform the backup with three simple commands, so log into your server using your PC and PuTTY, and then issue the three commands.
sudo service postfix stop
sudo service courier-imap stop
sudo cp -R /home/vmail/ vmail/
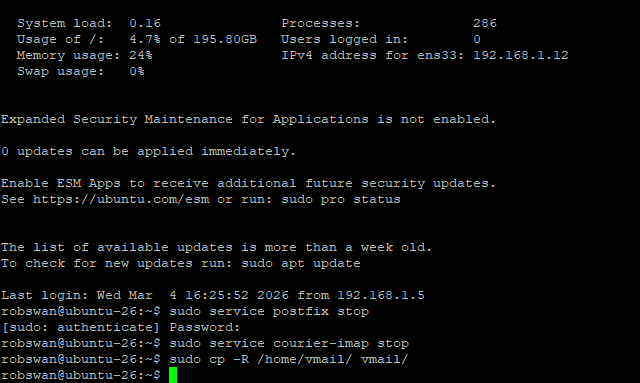
That is it, we are now all backed up.
The reason we stop the email services is to prevent new emails rendering our backups out of date, but whilst the services are stopped, you may lose any new emails that people have sent you, which is one of the reasons we have to perform all three of the procedures one after another without any breaks.
How To Perform your Dovecot conversion.
Like I said this procedure can be done just by running a script which is all ready to go.
Log into your server using your PC and PuTTY (if you are not already logged in).
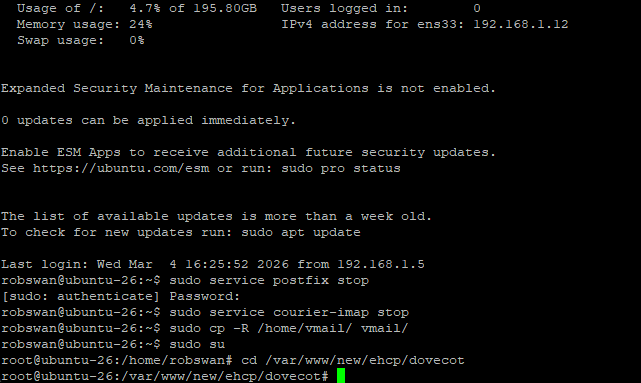
In order to run the script, you must be in root user mode and also be in the directory containing the script (you cannot run the script from another location).
Ok, issue these three commands one by one, to perform the conversion.
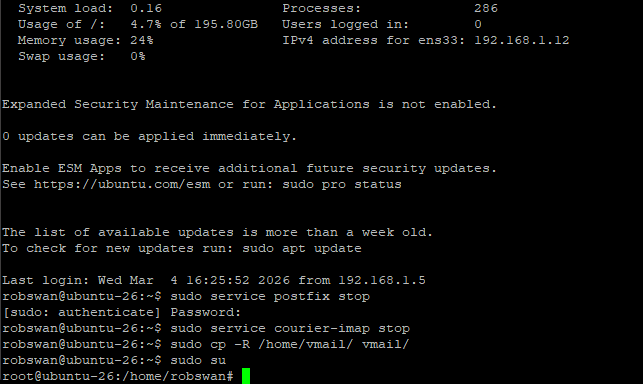
sudo su
cd /var/www/new/ehcp/dovecot
bash dovecot-convert.sh
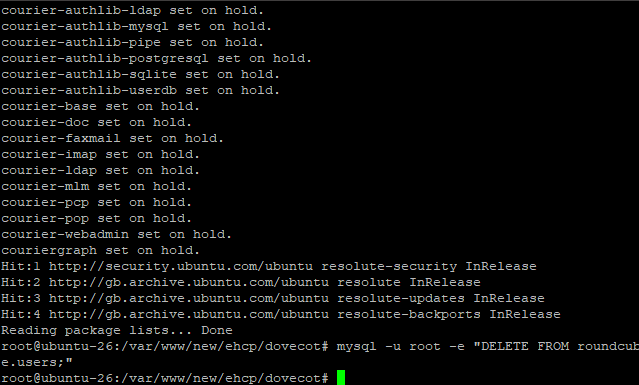
Next, we need to restore the Roundcube database back to it defauts, so issue this command.
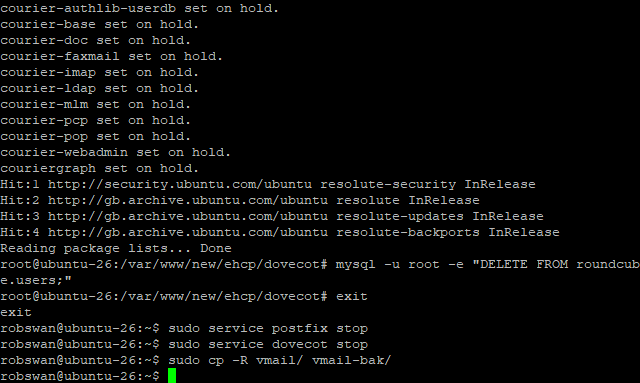
mysql -u root -e "DELETE FROM roundcube.users;"
Please finally come out of root user mode with this command.
exit
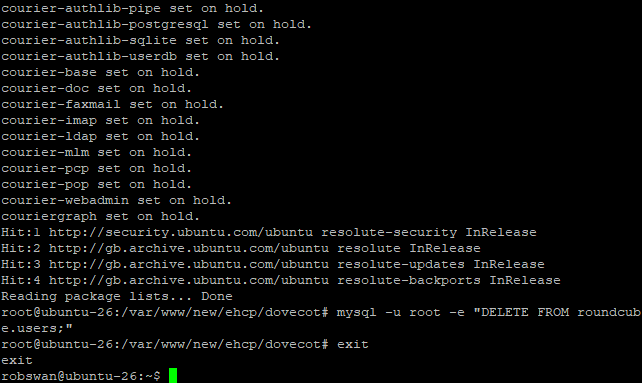
VERY IMPORTANT NOTES: If you ARE WANTING to restore any mailbox backups, DO NOT under any circumstances log into any of you your email accounts, as this could cause the RESTORE PROCESS TO FAIL. Also, if you are NOT WANTING to restore any mailbox backups, you can close PuTTY using the exit command. As we are done here.
How to restore your existing courier mailboxes.
ONLY DO THIS IS YOU NEED TO KEEP STORED EMAILS.
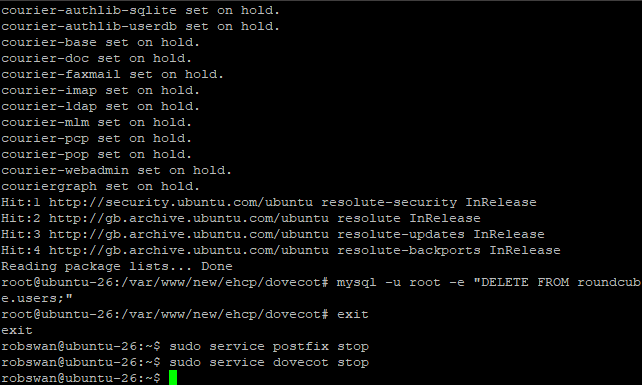
It is essential that you stop the email service RIGHT NOW, so immediately issue these commands (in PuTTY) to do that.
sudo service postfix stop
sudo service dovecot stop
Ok, next we are going to make a copy of our mailbox backup, just in case something goes wrong
Issue this command.
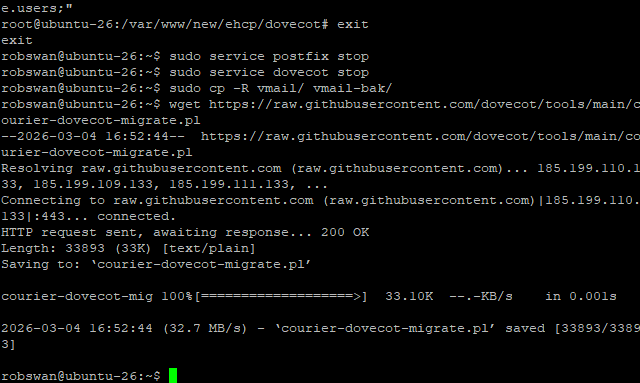
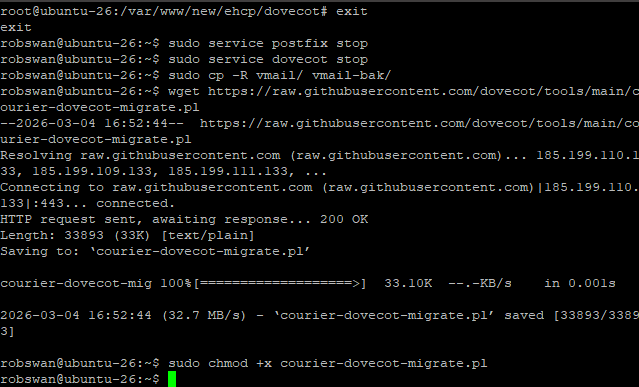
sudo cp -R vmail/ vmail-bak/
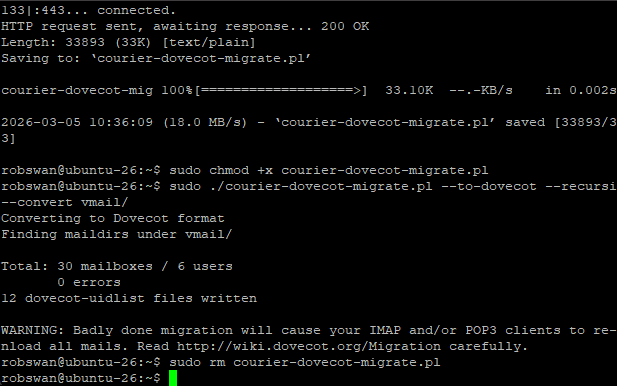
Ok, next we are going to use the git hub tool to perform the first part of the mailbox conversion process. Issue this command to download the tool.
wget https://raw.githubusercontent.com/dovecot/tools/main/courier-dovecot-migrate.pl
Next, let’s give the tool permission to execute using this command.
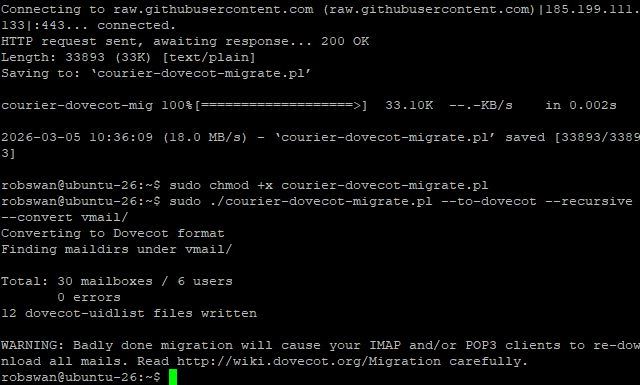
sudo chmod +x courier-dovecot-migrate.pl
Ok, now lets run the tool on our original backup folder. Issue this command to run the tool.
sudo ./courier-dovecot-migrate.pl --to-dovecot --recursive --convert vmail/
Now let’s delete the tool as we don’t need it anymore using this command.
sudo rm courier-dovecot-migrate.pl
Ok now for the hard bit.
Change into root user mode using this command, and change directory to our backup folder using these commands.
sudo su
cd vmail
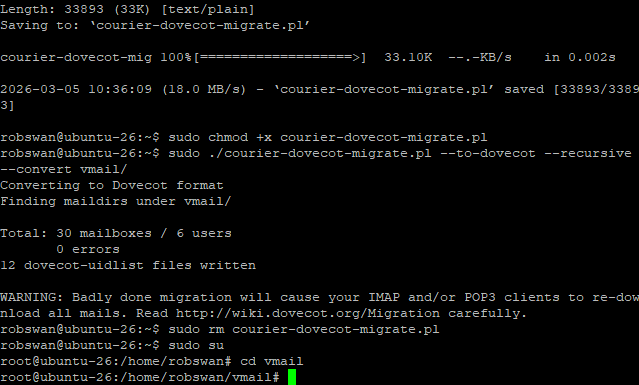
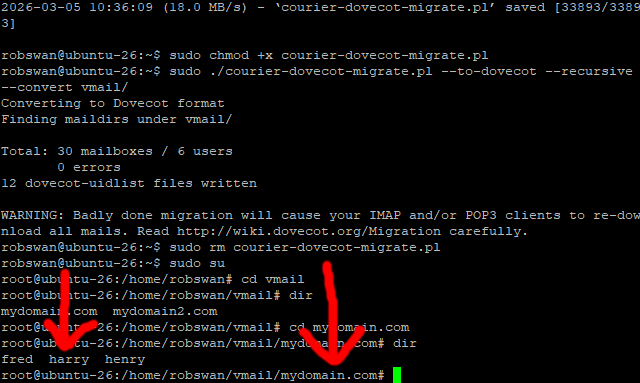
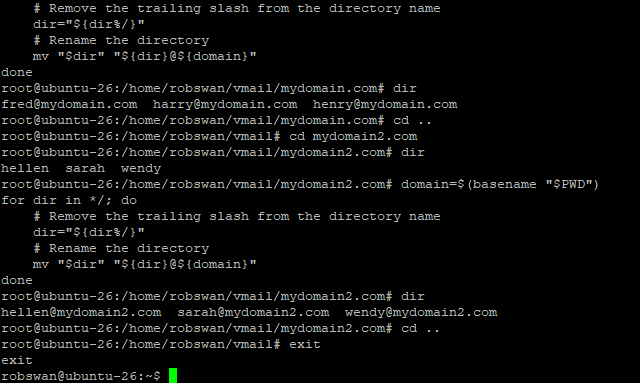
In the vmail directory there will be a sub directory with the same name as your domain name, if you have more than on domain on your server with email accounts, there will be a directory for each of them, so lets check the contents of the fodder using this command.
dir
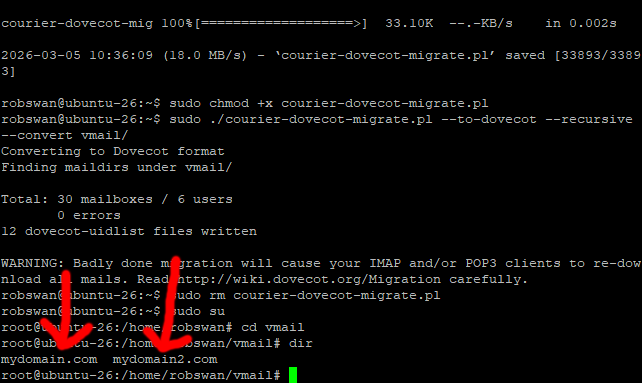
In the example picture we have two directories for two different domain names, however you may have a different number, hopefully you only have one, so it’s less work.
Ok you need to change into the directory for your first (maybe only) domain name.
Issue this command to change directory (replacing mydomain.com with your actual domain name)
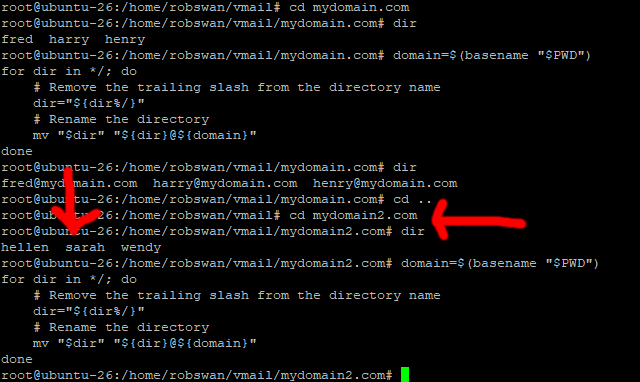
cd mydomain.com
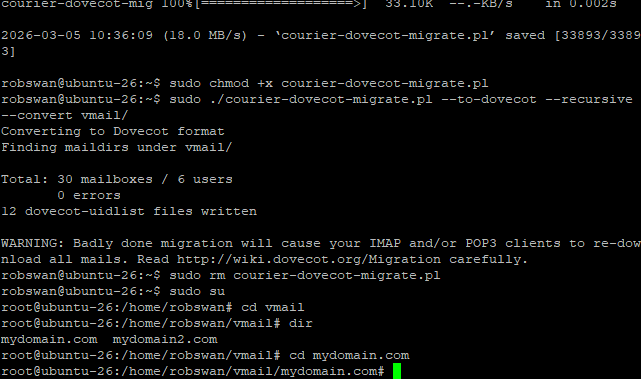
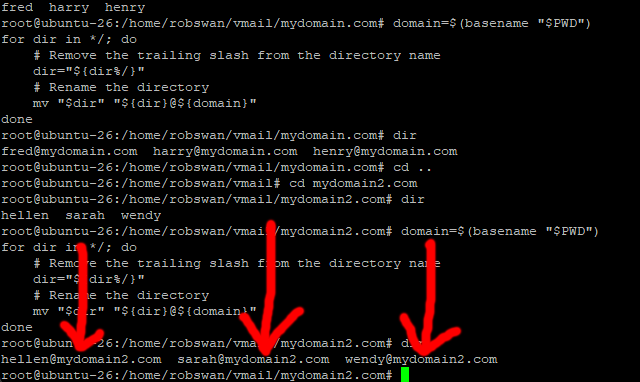
Now let’s check the content of this directory using the dir command again.
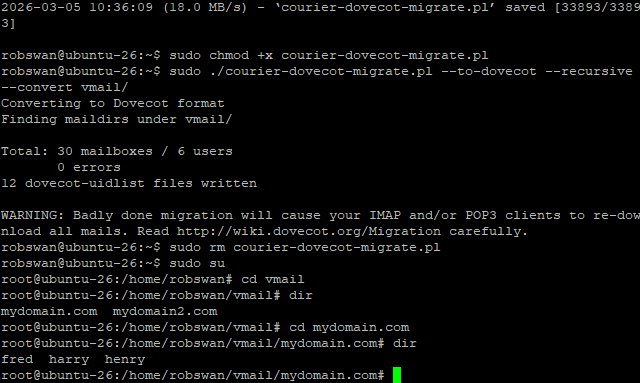
Each mailbox is represented by a directory which is named with the part of the email address before the @ sign, so for example if the mailbox was called fred@mydomain.com, then the directory will be called fred.
The problem is that in Dovecot, the directory must be named with the full mailbox name, not just the bit before the @ sign in the email address of mailbox name.
We MUST rename each of the mailbox directories, to fix this.
Ok, we need to exercise a little bit of caution here, we are going to run a very simple script to rename the directories, and if it is run in wrong directory, you may have a serious problem, so be careful.
When you are sure you are in the correct directory, and you can see all the mailbox names, paste this code in, then press enter.
Code: Select all
domain=$(basename "$PWD")
for dir in */; do
    # Remove the trailing slash from the directory name
    dir="${dir%/}"
    # Rename the directory
    mv "$dir" "${dir}@${domain}"
done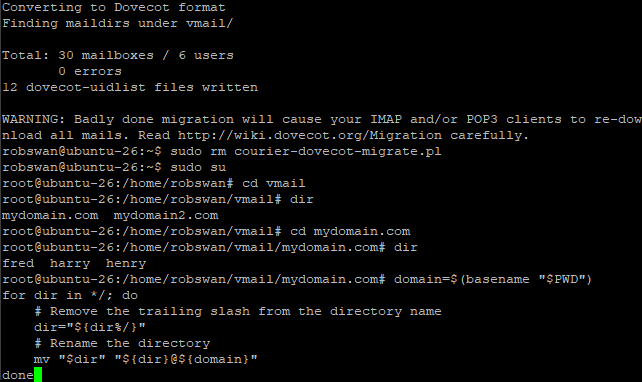
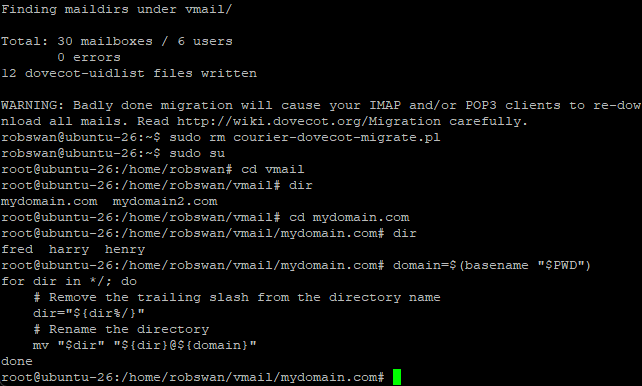
Lets check this worked, enter the dir command again to make sure.
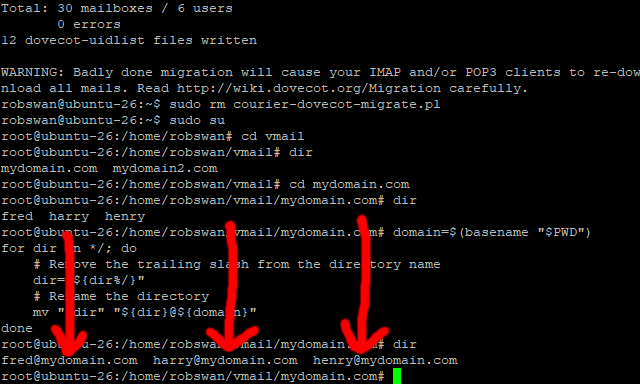
Ok next issue this command to go back one directory.
cd ..
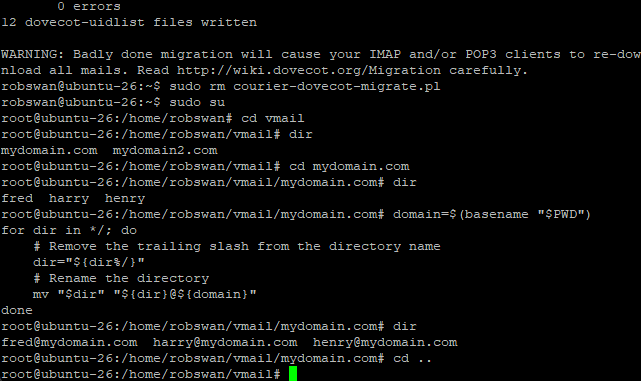
Now, if you only have one domain hosted on your server with email accounts, we are done with the renaming, however if the are more we need to do the rest in turn using the same procedure.
So, in these example pictures, I have done another on.

Ok when all of the mailbox directories have been successfully renamed, please come out of root user mode using the exit command.
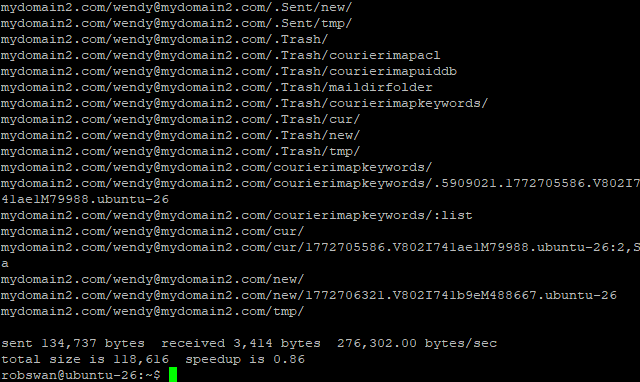
Ok, next we are going to sync the new Dovecot mailbox folder, with our converted backup using this command.
sudo rsync -av vmail/ /home/vmail/
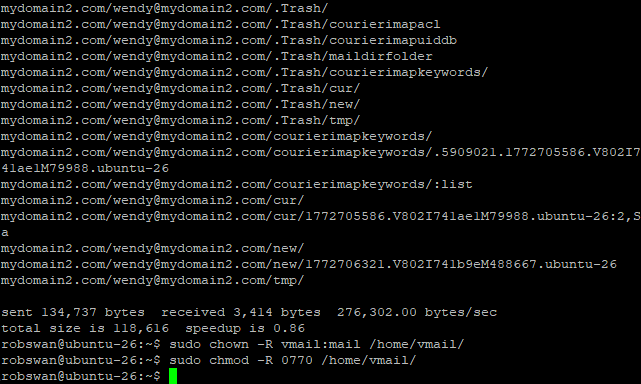
Next, we need to make sure the mailbox folders have the correct permissions, so issue these commands.
sudo chown -R vmail:mail /home/vmail/
sudo chmod -R 0770 /home/vmail/
Ok, now please reboot your sever using the usual command ( sudo shutdown -r now ).
Ok, once your server reboots, log into each of the mailboxes and test them, all of your emails should be where you left them, test sending and receiving to make sure all is well. Remember in most cases if an email you send bounces back, its a problem somewhere else (maybe you need to set up SMTP relay), and not an issue with the mailbox its self.
If you have any issues relating to any of the mailboxes then the restore process for that mailbox failed, and you will need to admit defeat, and follow this next procedure procedure to repair that mailbox, bearing in mind that you WILL LOSE the emails contained within it.
IF ALL IS WELL, WE ARE DONE HERE.
ONLY DO THIS IF A MAILBOX RESTORE FAILED!!
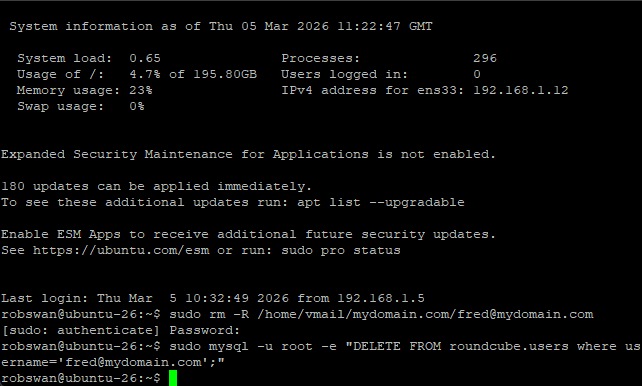
Issue this command to DELETE the CORRUPTED mailbox in PuTTY.
sudo rm -R /home/vmail/mydomain.com/fred@mydomain.com, replacing mydomain.com with the domain name of the corrupted mailbox, and of course replacing fred@mydomain.com with the name of the corrupted mailbox.
Next, use this command also to reset the mailbox in Roundcube.
sudo mysql -u root -e "DELETE FROM roundcube.users where username='fred@mydomain.com';" (replacing fred@mydomain.com, with the name of the corrupted mailbox).
You’re not going to believe this, but we are finally done here.