I have tried my best to improve this topic and where possible simplify the procedure.
If this is your first time setting up a server, and your domain name is brand new, then maybe following this topic could be overkill, however once your server gets noticed and the cyber criminals start to target your server, then at that point maybe you follow this topic.
As your server is based on Linux, security is always going to be strong, as Ubuntu server 26.04 is a very secure operating system.
Before you start with this topic, it is important that you fixed Fail2ban form the details in THIS POST.
Making the changes to Fail2ban in this topic, will increase your server security, by making it less likely your server will get hacked into by some idiot.
Please be aware that no system security is ever perfect, but in my opinion it is better to reduce that risk a bit, anyway it is you call.
This topic is quite a complicated process, so if you opt to do this, make sure you have plenty of time.
To make it a bit easier, I have broken it down into bite size chunks as follows.
1. Create an /etc/cron.d/ file.
2. Activate Some New Log Files.
3. New Logrotate Settings.
4. New Configuration Settings For Fail2ban.
5. Fail2ban Basic Operations (How To Use).
There is no reason why you cannot take a break between each section!
Ok, let’s get started with part 1.
1. Create an /etc/cron.d/ file.
Connect to your server using PuTTY and your PC.
Change into root user mode by entering this command.
sudo su
As always, you may need to re-enter your password.
Then paste this code in and then press enter.
Code: Select all
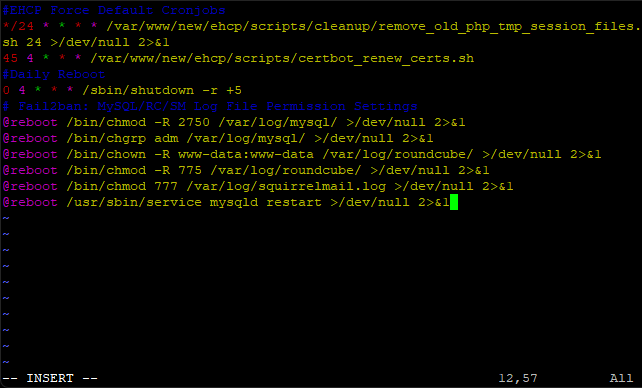
cat > /etc/cron.d/f2blogfiles<< EOF
# Fail2ban: MySQL/RC/SM Log File Permission Settings
@reboot root /bin/chmod -R 2750 /var/log/mysql/ >/dev/null 2>&1
@reboot root /bin/chgrp adm /var/log/mysql/ >/dev/null 2>&1
@reboot root /bin/chown -R www-data:www-data /var/log/roundcube/ >/dev/null 2>&1
@reboot root /bin/chmod -R 775 /var/log/roundcube/ >/dev/null 2>&1
@reboot root /bin/chmod 777 /var/log/squirrelmail.log >/dev/null 2>&1
@reboot root /usr/sbin/service mysqld restart >/dev/null 2>&1
EOF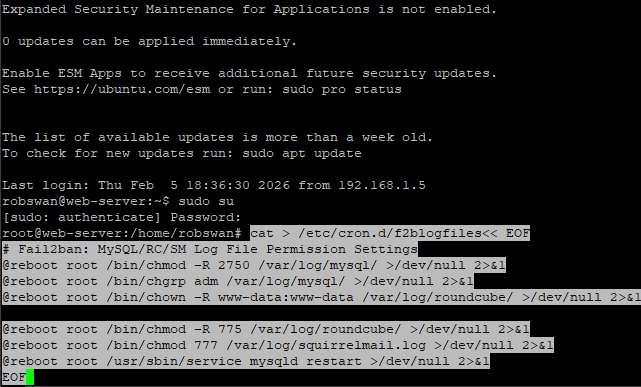
Come out of root user mode using this command.
exit
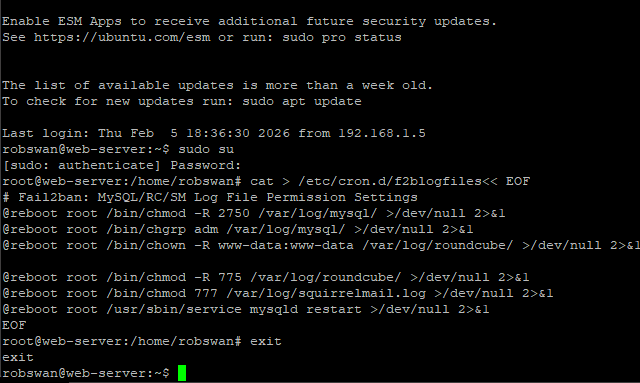
That should now be done.
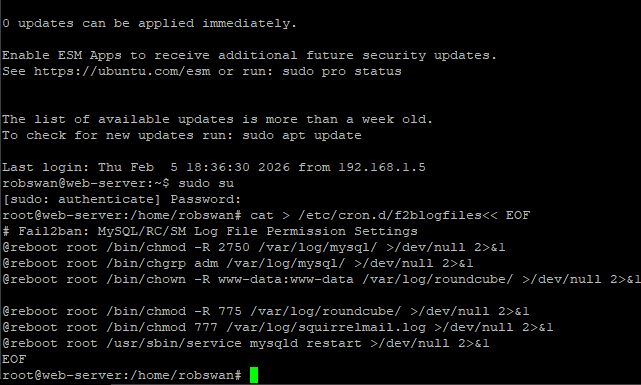
If you want to check it worked ok, you can do so using this command.
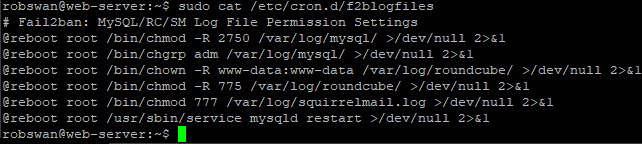
sudo cat /etc/cron.d/f2blogfiles
The output should look like this.
If yours does look different or you get an error, simply try again.
So, what have we done?
We have given read write permissions to the logs files we need to be working. Ubuntu server has a nasty habit of resetting permissions, so we have set it to do this each time the server reboots. This will make sure that we never have a problem with the log files.
2. Activate Some New Log Files.
Fail2ban watches log files to check for failed log in attempts by potential hackers, most of the applications on your server log these things already, but unfortunately three of them do not.
Hackers are well aware that most people will not have these applications monitored by Fail2ban so they may choice to use them as a possible way in.
The three applications that we need to change are Roundcube (your main online email client), MySQL and Squirrelmail (the alternative email client that is on your server).
We will start with Roundcube first.
Ok, if you did not run the script from THIS POST, and turned on logging that’s what we need for this to work, however if you did not, please go back to that post and re-run the script and turn on logging in Roundcube.
So, Roundcube should already be sorted!
The next one to sort is MySQL.
When you installed my modified version of EHCP force, MySQL logging was turned on by the installer.
I added it, so there is less command line work to do post install.
So, MySQL should already be sorted!
Next we need to do Squirrelmail, and this does require us to do some work, but don't worry, its not as complicated as it used to be.
I have created a downloadable version of Squirrelmail, this version is the exact same version you already have on your server. The only difference is that this version has logging turned on.
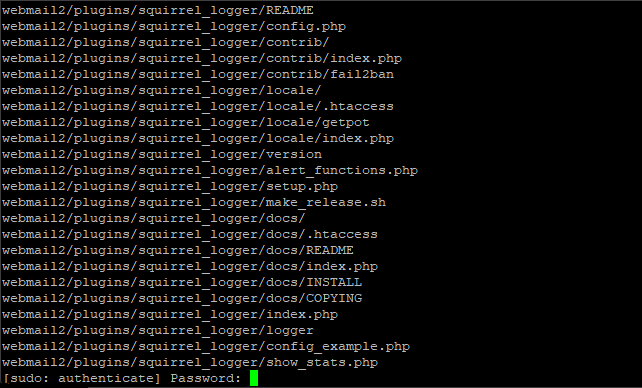
If you not already, log into your server using PuTTY, and issue this command to download your new version of Squirrelmail.
wget https://downloads.ghostnetwork.co.uk/fixes/squirrelmail/squirrelmail.tar.gz
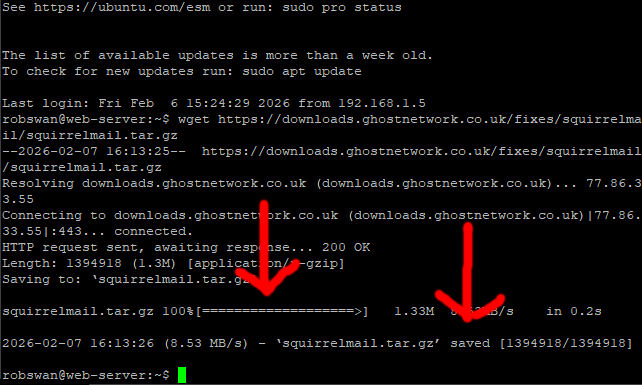
Its very important that the file squirrelmail.tar.gz downloaded without any errors, as if the file did not download properly and you continue on, all you will achieve is to delete Squirrelmail from you server.
If the file did not download, DO NOT CONTINUE.
You can double check you have the file by entering this command.
dir
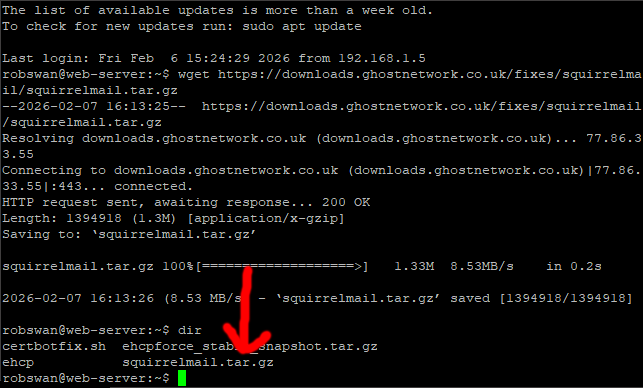
If you don't have the file, then wait a few minutes and try the download command again.
Once, you are 100% sure you have the file, paste in this script, then press enter to install your new version of Squirrelmail.
Code: Select all
tar -zxvf "squirrelmail.tar.gz"
sudo rm -R /var/www/new/ehcp/webmail2/
sudo mv webmail2/ /var/www/new/ehcp/webmail2/
sudo chown -R root:www-data /var/www/new/ehcp/webmail2
sudo chmod 754 -R /var/www/new/ehcp/webmail2
sudo chown -R ftp:www-data /var/www/new/ehcp/webmail2/data
sudo chmod -R 774 /var/www/new/ehcp/webmail2/data
sudo touch /var/log/squirrelmail.log
sudo chown www-data:www-data /var/log/squirrelmail.log
sudo chmod 777 /var/log/squirrelmail.log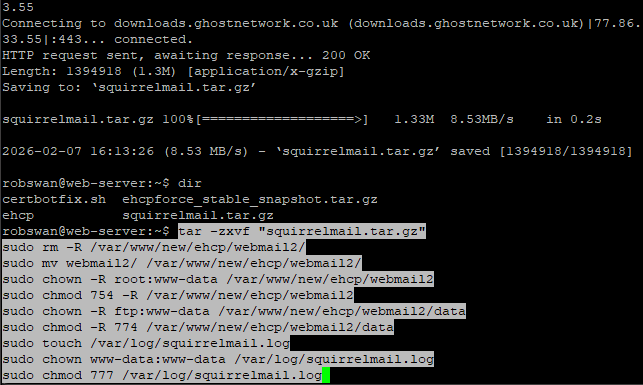
As always you may need to re-enter your password.
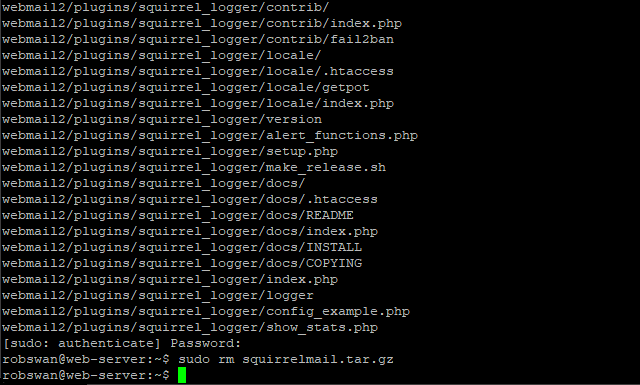
Finally, enter this command to delete the file we just downloaded.
sudo rm squirrelmail.tar.gz
IMPORTANT NOTES: -
When updating EHCP force you MUST use the script in THIS POST, or the work we have done to enable the Squirrel logger will be undone.
Ok, that should be Squirrelmail set up for logging.
This may be a good time to take a break as we still have a lot to do but it’s safe to take a break at this point.
3. New Logrotate Settings.
It’s a good idea to add the new Squirrelmail log file to Logrotate.
Logrotate is basically an application on your server that stops log files getting too large as it cleans them out periodically.
Thankfully this is a relatively simple task.
So, staying with PuTTY, issue this command.
sudo vi /etc/logrotate.d/squirrelmail
Press I for insert and paste in this code.
Code: Select all
/var/log/squirrelmail.log
{
  su www-data www-data
  create 0777 www-data www-data
  compress
  delaycompress
  missingok
  notifempty
  rotate 5
  weekly
}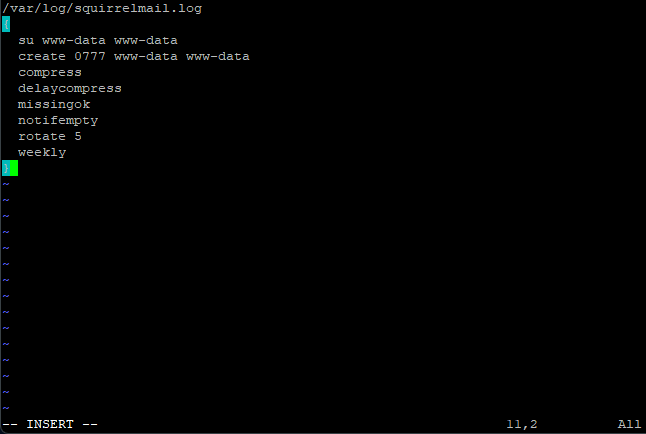
Save and exit (escape :w (enter) :q (enter))
Yes, that is it done for Squirrelmail.
Ok, MySQL has already got settings in Logrotate, so no action is needed.
Next, Roundcube has a configuration in Logrotate, but it is not the best.
Rather than messing about editing the file we are just going to replace it contents in full.
So, issue this command.
sudo vi /etc/logrotate.d/roundcube-core
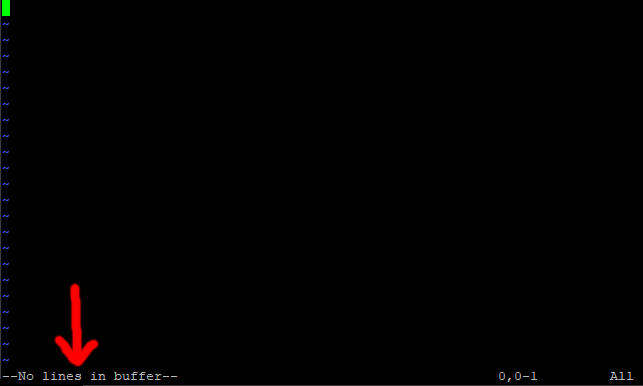
Next press colon (:), then its %, finally press d (:%d).
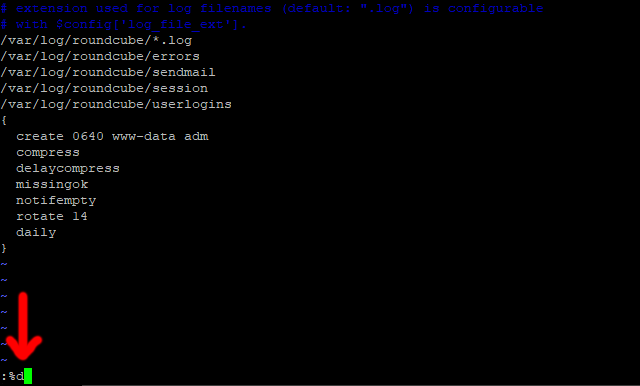
Press the enter key, to clear the contents of the file.
Now, press I for insert, and paste in this code.
Code: Select all
# extension used for log filenames (default: ".log") is configurable
# with $config['log_file_ext'].
/var/log/roundcube/*.log
/var/log/roundcube/errors
/var/log/roundcube/sendmail
/var/log/roundcube/session
/var/log/roundcube/userlogins
{
  su www-data www-data
  create 0775 www-data www-data
  compress
  delaycompress
  missingok
  notifempty
  rotate 5
  weekly
}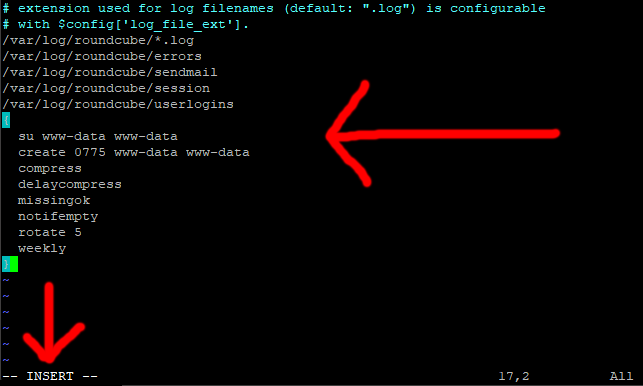
Save and exit (escape :w (enter) :q (enter)).
We are now done with Logrotate.
4. New Configuration Settings For Fail2ban.
Ok, so now its time for the tricky bit.
As you will probably know, Fail2ban blocks suspicious IP addresses from your server.
Each potential entry point is called a Jail.
So, for example if someone tries to log into Roundcube webmail and has a set number of failed attempts, Fail2ban will automatically ban them from accessing your server.
There IP address will be stored in the Roundcube Jail within Fail2ban, they will only be un-banned when either you tell Fail2ban to do so, or a set amount of time has passed.
We control how many failed attempts result in a ban, and how long an IP address should remain banned for.
As a general rule I recommend setting the ban time for 1 year, and the number of failed attempts that result in a ban as 5.
We can also stop Fail2ban blocking us by telling it to ignore certain IP Addresses.
We can see how many jails Fail2ban is currency running using this command in PuTTY.
sudo fail2ban-client status

As you can see, we are currency running 7 jails, this is not enough in my opinion.
Most of the settings for Fail2ban are stored in the file jail.local in the folder /etc/fail2ban/.
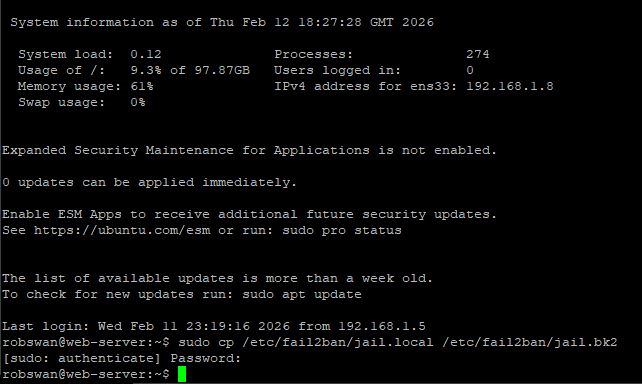
Let get started then, first lets take a backup of the Fail2ban jail.local configuration file.
So, from within PuTTY, enter this command.
sudo cp /etc/fail2ban/jail.local /etc/fail2ban/jail.bk2
Issue this command to edit the main setting file for Fail2ban.
sudo vi /etc/fail2ban/jail.local
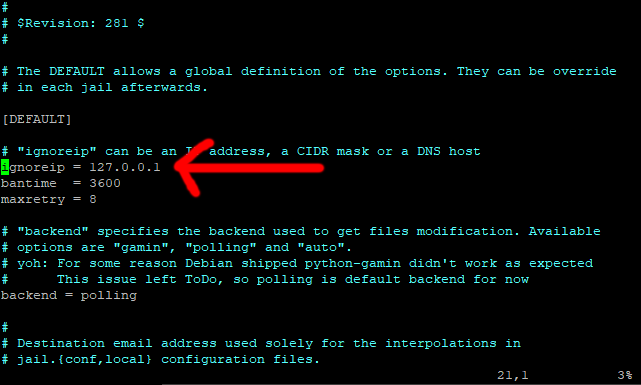
The first thing we are going to look at is the ignore IP setting.
Move to the line that says ignoreip = 127.0.0.1 (about line number 21).
Place the cursor at the end of the line, press I for insert, move on place to the right, next press space.
Type your routers local IP Address (usually 192.168.1.1), then space, then your public IP address (the one from your ISP), its space again and finally the local IP address of the main PC that you use to access your server (NOT your server local IP address).
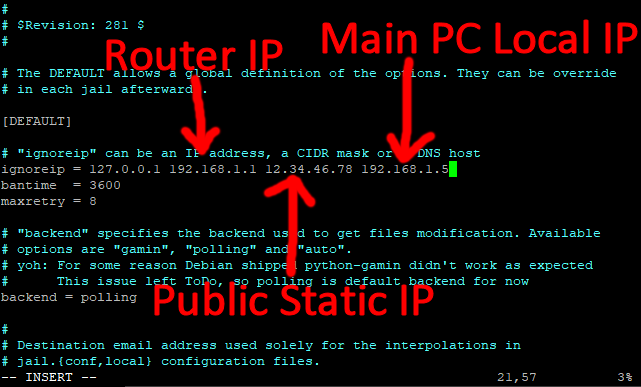
You can add as many IP addresses as you want to this line (separated by a space).
As the line suggests, these are the IP addresses that Fail2ban will ignore.
Move down to the next line (bantime) and change it to 525600m (1 year), this is how long in minutes we want to ban someone.
Now move down one more line and change the maxretry to 5 (this is how many failed attempt to allow before someone is banned).
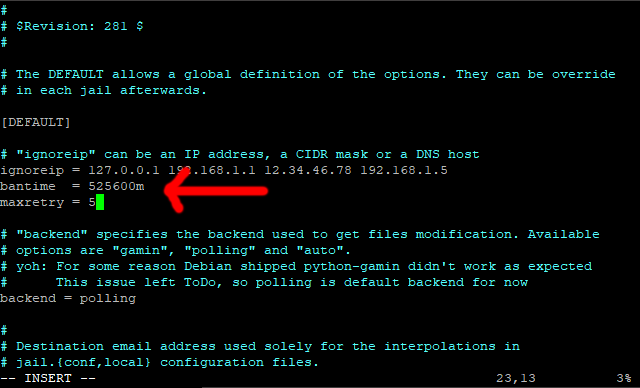
Next, move your cursor to the beginning of the line under maxretry = 5 (no need to add a new line).
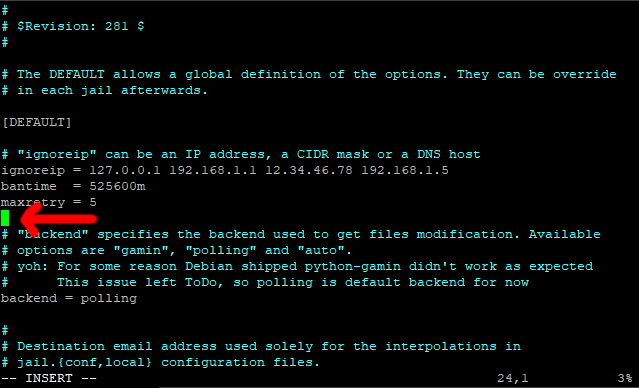
Paste in this line.
findtime = 1440m
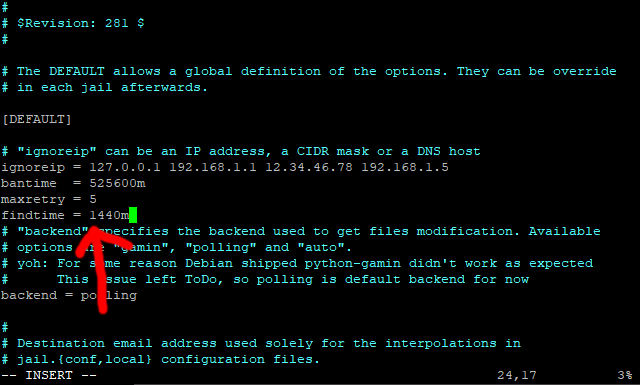
Find time is the length of time Fail2ban, counts failed attempts from an IP address.
As there are 1440 minutes in 24 hours, we telling Fail2ban to ban anybody with 5 failed attempts within a 24 hour period for 1 year.
These are the default settings, they can be overridden within an individual jail (if you feel the need).
You can if you wish, change the above stettings to whatever you want, however these are the settings I personally recommend.
Before we change anything else we are going to apply these settings so save and exit (escape :w (enter) :q (enter))
Issue this command to restart Fail2ban.
sudo fail2ban-client restart
If all is good with our new settings you should see Server Ready.

Note:
If you get any error messages and Fail2ban wont restart, copy back in your backup file, start Fail2ban and then try again. To copy your backup file back in, and then restart Fail2ban use these commands.
sudo cp /etc/fail2ban/jail.bk2 /etc/fail2ban/jail.local ONLY IF AN ERROR OCCURS
sudo fail2ban-client start ONLY IF AN ERROR OCCURS
Before we go an further, lets take another backup of the Fail2ban jail.local configuration file.
So, from within PuTTY, enter this command.
sudo cp /etc/fail2ban/jail.local /etc/fail2ban/jail.bk3

Now, please reopen the file with the same command.
sudo vi /etc/fail2ban/jail.local
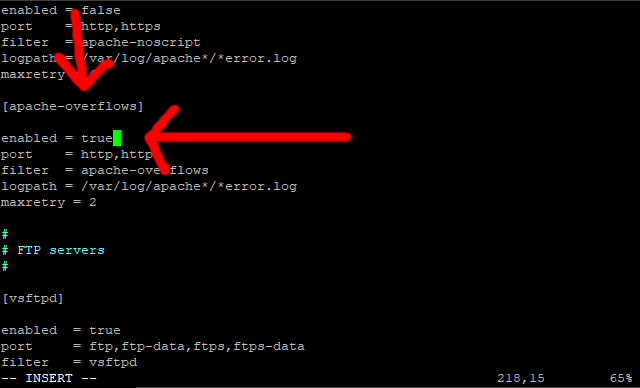
Scroll down to the line that says [apache-overflows] (should be about line 216)
This is the section for a jail called [apache-overflows]
Now, we are going to turn this jail on.
So scroll down 2 lines, to the line that says enabled = false
Press I for insert, and change false to true.
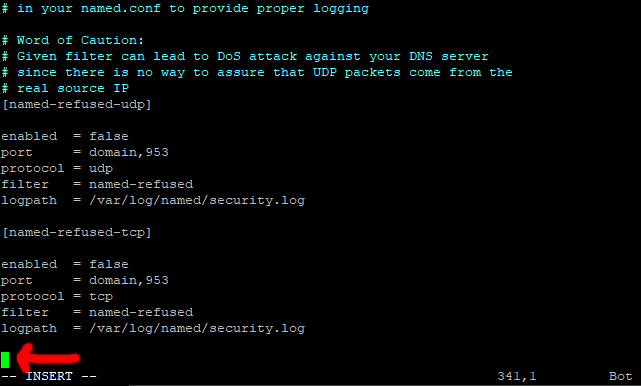
Scroll Down to the bottom of the file.
Then press enter to create a line space.
Ok, this is where it can be quite easy to make a mistake.
When you first installed EHCP force, you were asked the question about converting your installation to Dovecot (and Postfix).
We are going to paste a large code block in next, which assumes that you said YES to the Dovecot question at install time.
If for some reason known only to you, you said NO to the Dovecot question we will have to edit the code block to reflect your choice.
First off, lets paste the code in, so please paste in this code.
Code: Select all
#Extra Jails Not Listed By Default---------------------------------------------

#apache
[apache-auth]
enabled = true
port     = http,https
logpath  = %(apache_error_log)s

[apache-badbots]
# Ban hosts which agent identifies spammer robots crawling the web
# for email addresses. The mail outputs are buffered.
enabled = true
port     = http,https
logpath  = %(apache_access_log)s
bantime  = 48h
maxretry = 1

[apache-botsearch]
enabled = true
port     = http,https
logpath  = %(apache_error_log)s
maxretry = 2

[apache-fakegooglebot]
enabled = true
port     = http,https
logpath  = %(apache_access_log)s
maxretry = 1
ignorecommand = %(fail2ban_confpath)s/filter.d/ignorecommands/apache-fakegooglebot <ip>

[apache-modsecurity]
enabled = true
port     = http,https
logpath  = %(apache_error_log)s
maxretry = 2

[apache-shellshock]
enabled = true
port    = http,https
logpath = %(apache_error_log)s
maxretry = 1

[apache-nohome]
enabled = true
port     = http,https
logpath  = %(apache_error_log)s
maxretry = 2

#------------------------------

#Webmail
[roundcube-auth]
enabled = true
port     = http,https
logpath  = /var/log/roundcube/errors.log

[squirrelmail]
enabled = true
port = smtp,465,submission,imap,imap2,imaps,pop3,pop3s,http,https,socks
logpath = /var/log/squirrelmail.log

#------------------------------

#MySQL
[mysqld-auth]
enabled = true
port     = 3306
logpath  = /var/log/mysql/mysql.log
backend  = %(mysql_backend)s

#------------------------------

#PHPMyAdmin
[phpmyadmin-syslog]
enabled = true
port    = http,https
logpath = %(syslog_authpriv)s
backend = %(syslog_backend)s

#------------------------------

#Sendmail
[sendmail-auth]
enabled = true
port    = submission,465,smtp
logpath = %(syslog_mail)s
backend = %(syslog_backend)s

[sendmail-reject]
enabled = true
port     = smtp,465,submission
logpath  = %(syslog_mail)s
backend  = %(syslog_backend)s

#------------------------------

#Dovecot
[dovecot]
enabled = true
port    = pop3,pop3s,imap,imaps,submission,465,sieve
logpath = %(dovecot_log)s
backend = %(dovecot_backend)s

#End---------------------------------------------------------------------------

Ok, you may notice that conveniently at the end of the code is the Dovecot Jail section, put simply if you said NO to Dovecot, change enabled = true to enabled = false, remember if you said YES to Dovecot then NO CHANGE IS NECESSARY.
Ok, save and exit (escape :w (enter) :q (enter)).
Issue this command to restart Fail2ban.
sudo fail2ban-client restart
Again, if all is good with our new settings you should see Server Ready.
Note:
If you get any error messages and Fail2ban wont restart, copy back in your backup file, start Fail2ban and then try again. To copy your backup file back in, and then restart Fail2ban use these commands.
sudo cp /etc/fail2ban/jail.bk3 /etc/fail2ban/jail.local ONLY IF AN ERROR OCCURS
sudo fail2ban-client start ONLY IF AN ERROR OCCURS
If you still get an error, Fail2ban should tell you which Jail is causing the error, so maybe look over the section in this topic that relates to your error.
Now, let’s issue this command to see our new Jails and configuration in all of their glory.
sudo fail2ban-client status

Ok, that is Fail2ban (Finally) sorted.
5. Fail2ban Basic Operations (How To Use).
Every time Fail2ban actually bans someone it will send you an email to the email address we set up in THIS POST, don’t be alarmed if you start getting a lot of these emails, as most servers get spotted very quickly by hackers.
The email can give you a lot of detail about the offending IP address.
In the unusual event that you wish to unban someone it can be done from a single command in Putty.
Ok, here is how to unban someone.
First of all examine the email that informed you of the ban, you need the IP address and the jail name in order to unban it.
Here is an example, so you get the idea.
So let’s open one of these emails, and look at the information at the top.
This is one of mine.
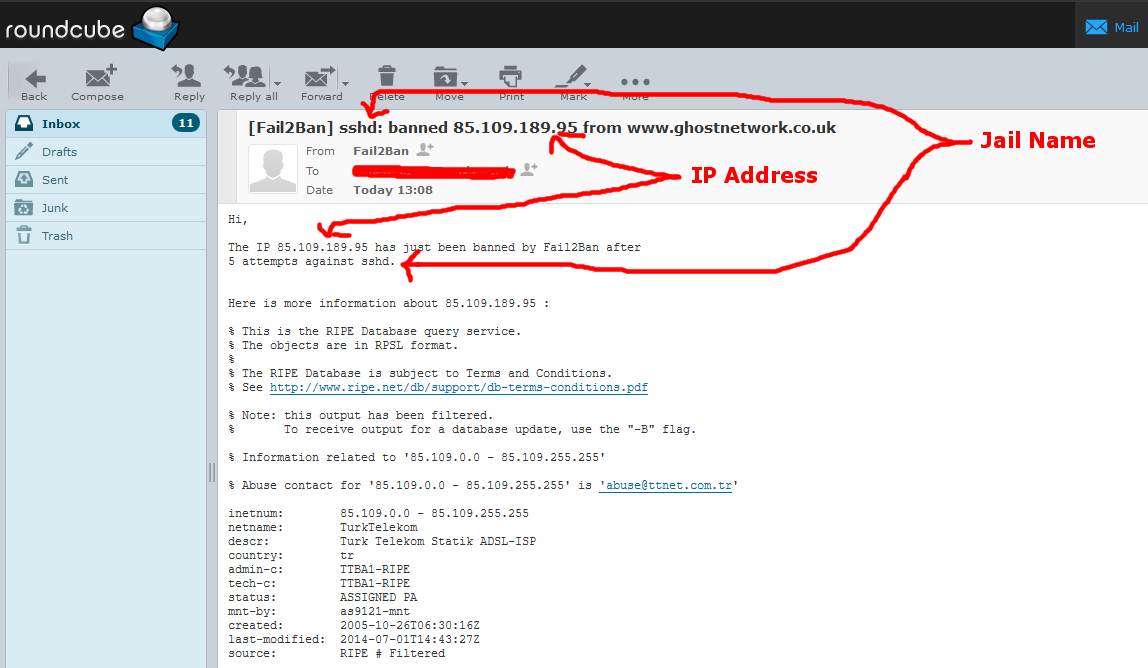
So in this example the IP address is 85.109.189.95, and the jail name sshd.
So to unban this one in Putty the command would be.
sudo fail2ban-client set sshd unbanip 85.109.189.95
As the basic command is
sudo fail2ban-client set JAIL-NAME unbanip IP-ADDRESS
So you would replace JAIL-NAME with sshd and IP-ADDRESS with 85.109.189.95 in our first example.
Hopefully you get the idea.
You can also get the information on who is banned from Putty, to do this first go into root user mode, using this command.
sudo su
Then issue this command.
Code: Select all
fail2ban-client status | grep "Jail list:" | sed "s/ //g" | awk '{split($2,a,",");for(i in a) system("fail2ban-client status " a[i])}' | grep "Status\|IP list"
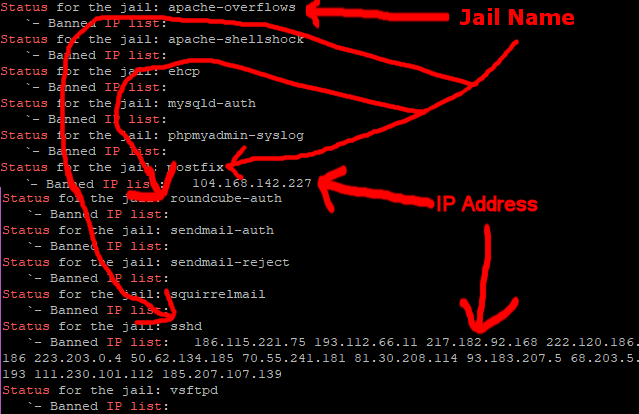
It’s always worth checking using this method, I have known occasions, when I have not actually had an email about a ban.
After issuing this command come out of root user mode with this command.
exit
That’s it then, another job done.
NOTE: Please make sure you use the update script in THIS POST when updating EHCP force.